Installing an SSL/TLS certificate on a Linux server ensures several crucial benefits for domain owners: secure, encrypted connections, improved search engine rankings, and enhanced trust with prospective and current customers. So, knowing how to install an SSL certificate in Linux is crucial for every organization.
The secure sockets layer (SSL), or more accurately the transport layer security (TLS) protocol, encrypts data between your server and its visitors. This safeguards sensitive information like logins, payment details, and API transactions. A valid SSL certificate also prevents browser warnings and enables HTTP/2 for performance boosts.
Whether you’re managing a small virtual private server (VPS) or a large enterprise setup, this step-by-step guide will help you configure SSL in Linux manually or using an automated tool (in this case, CertPanel AutoInstall SSL).
Before You Can Install an SSL Certificate, You First Must Get One
You can’t install what you don’t have, right? We offer a wide selection of SSL/TLS certificates at some of the industry’s best prices.
How to Manually Install SSL on Linux
Manual installation gives you complete control over the SSL setup. We’ll start by creating your certificate signing request (CSR) and private key.
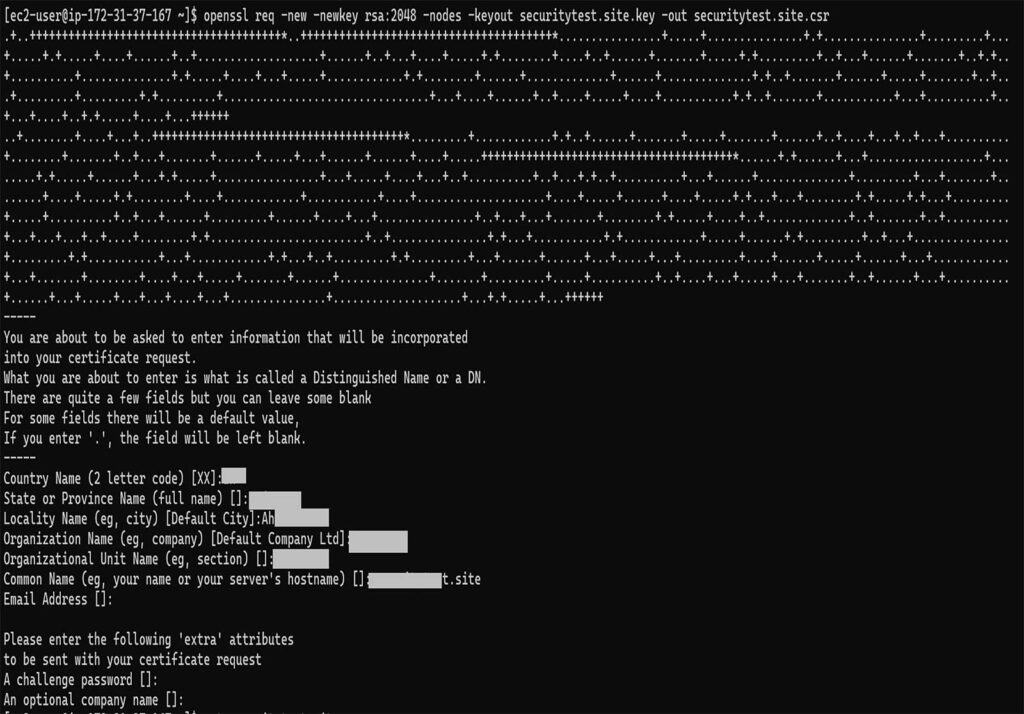
Step 1: Generate a Private Key and CSR on Your Server
Depending on your Linux distribution, use the appropriate command:
For Ubuntu/Debian
sudo openSSL req -new -newkey rsa:2048 -nodes -keyout /etc/SSL/yourdomain.key -out /etc/SSL/yourdomain.csrFor CentOS/RHEL/AlmaLinux/Rocky
openSSL req -new -newkey rsa:2048 -nodes -keyout /etc/pki/tls/private/yourdomain.key -out /etc/pki/tls/certs/yourdomain.csrYou’ll be prompted to enter several key pieces of data:
- Common Name (e.g., your website domain name [example.com or *.example.com website for wildcard SSL/TLS certificates])
- Organization Name
- Country, State, and City
Step 2: Upload the CSR and Complete Domain Validation
For this next step, you’ll want to submit the CSR to your certificate provider. You can generally do this through the provider’s website. If you purchased an SSL/TLS certificate from us, then you can do this process easily through our CertPanel dashboard using the following directions.
- Log in to access the CertPanel dashboard.
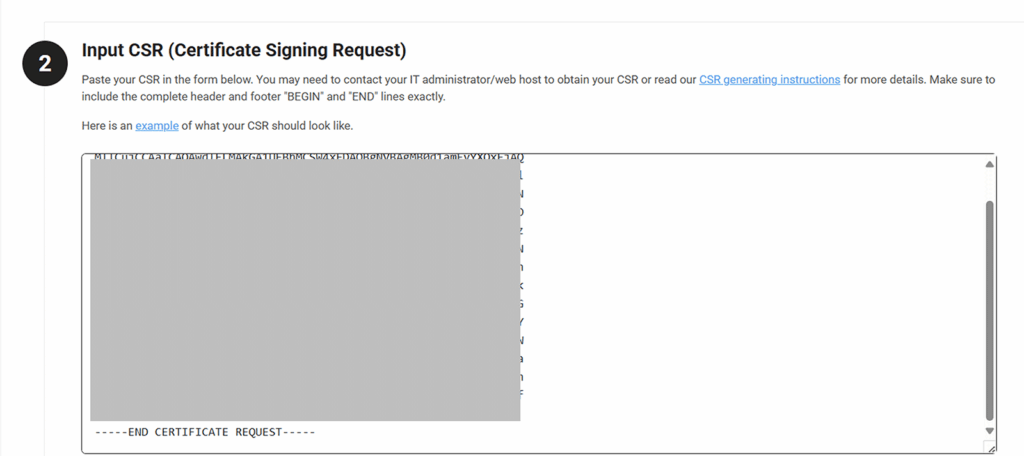
- Start the Certificate Enrollment process.
- Upload the .csr file or paste its contents in the form field (as shown in the screenshot below). This will include everything starting and ending with the —–BEGIN CERTIFICATE REQUEST—– and —–END CERTIFICATE REQUEST—– tags.
- Select your SSL type (e.g., basic, wildcard, multi-domain).
- Choose your domain control validation (DCV) method (e.g., HTTP File or DNS CNAME).
- Complete the domain validation process as instructed by the directions posted in CertPanel.
Once control of your domain has been verified, it’s time to download your certificate and CA bundle files from your CA provider or CertPanel:
- certificate.crt – This is the leaf (server) certificate for your domain.
- your_ca_bundle.ca-bundle or fullchain.pem – This contains the CA certificate chain data.
You’ll need to upload these files to your server and configure their permissions.
Step 3: Upload and Configure the SSL Certificates on Your Linux Server
The directions for installing and configuring your certificates may vary slightly based on your specific operating system and distro. You can follow our dedicated SSL/TLS installation and configuration guides to aid you with the process:
🔗 How to Install & Configure an SSL Certificate on an Apache2 Web Server (Ubuntu)
🔗 How to Install an SSL Certificate on NGINX Ubuntu Manually or Automatically
🔗 How to Install an SSL Certificate on CentOS 7 (Apache)
These guides will walk you through the following processes:
- Uploading your certificate files
- Updating your SSL config files
- Reloading your Apache2 or NGINX
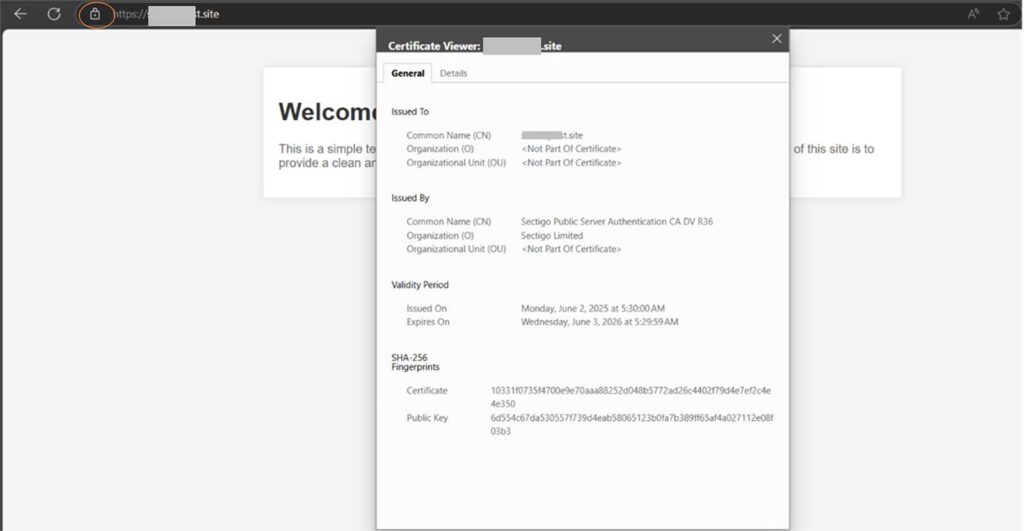
Step 4: Verify the SSL Installation Process Was Successful
To check whether the changes you’ve made have taken effect, open your browser and enter your domain in the web address bar with https:// at the beginning and hit Enter.
You should see a padlock in the address bar, indicating that your SSL/TLS certificate was successfully installed in Linux.
How to Automate SSL Installation with CertPanel AutoInstall SSL
Prefer to set this whole process on autopilot using automation? CertPanel’s AutoInstall SSL agent can take care of everything for you — even future certificate renewals.
Step 1: Download and Run the AutoInstall SSL Agent
- Log in to CertPanel.
- Select your domain and choose the AutoInstall SSL option.
- Choose:
- Linux Server as your certificate type
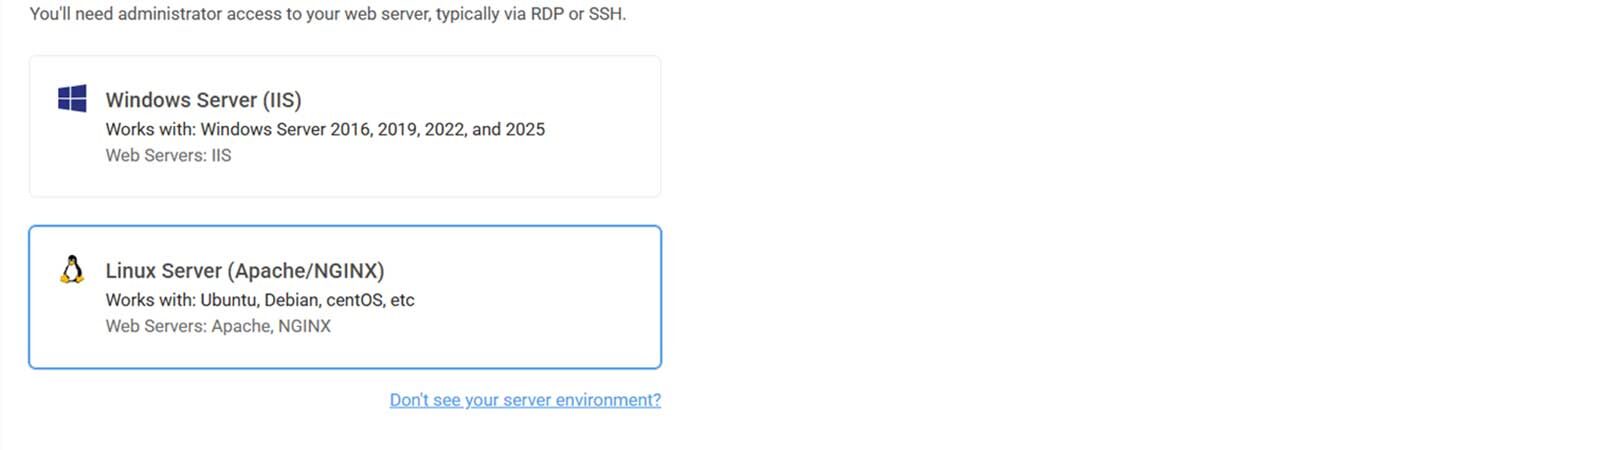
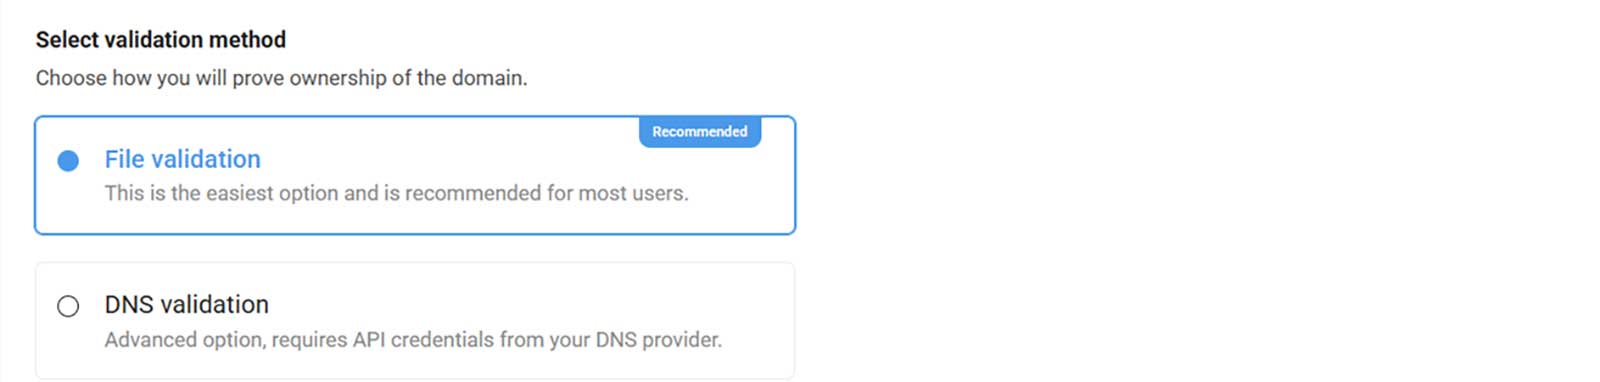
- Your preferred method of domain validation
- Copy and paste the following command (as seen in Step 1 of the screenshot below) to install AutoInstall SSL on your Linux server:
sudo wget -qO -https://files.autoinstallssl.com/packages/linux/version/latest/get.autoinstallssl.sh | sudo bash -s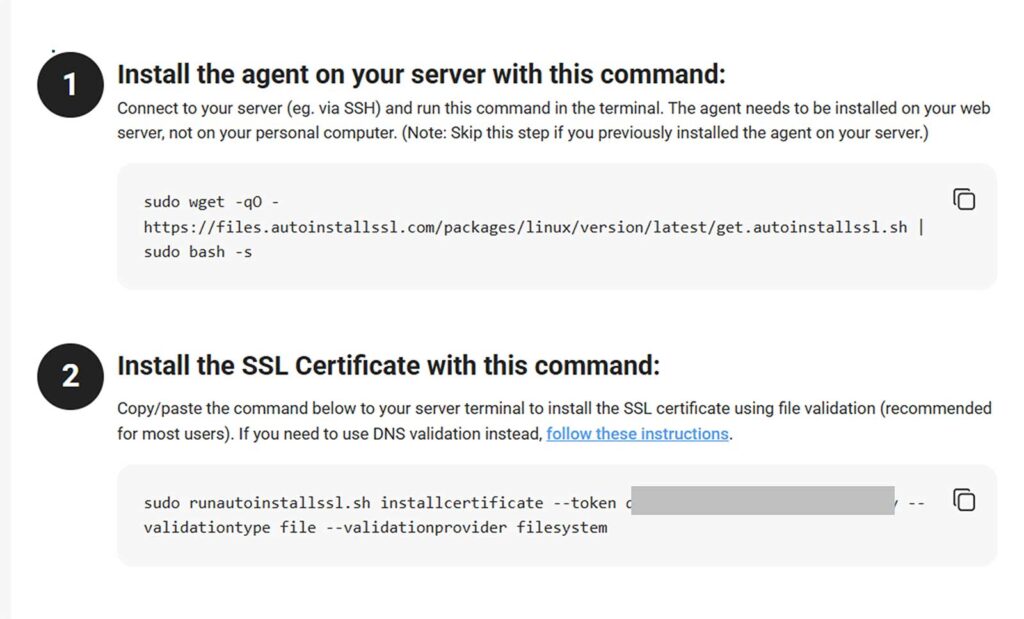
- Following the directions specified in Step 2 of the screenshot above, run this command to install your SSL/TLS certificate on your server:
sudo runautoinstallssl.sh installcertificate --token <token-value> --validationtype file –validationprovider filesystemNOTE: The command above and the values required will vary based on your DNS provider.
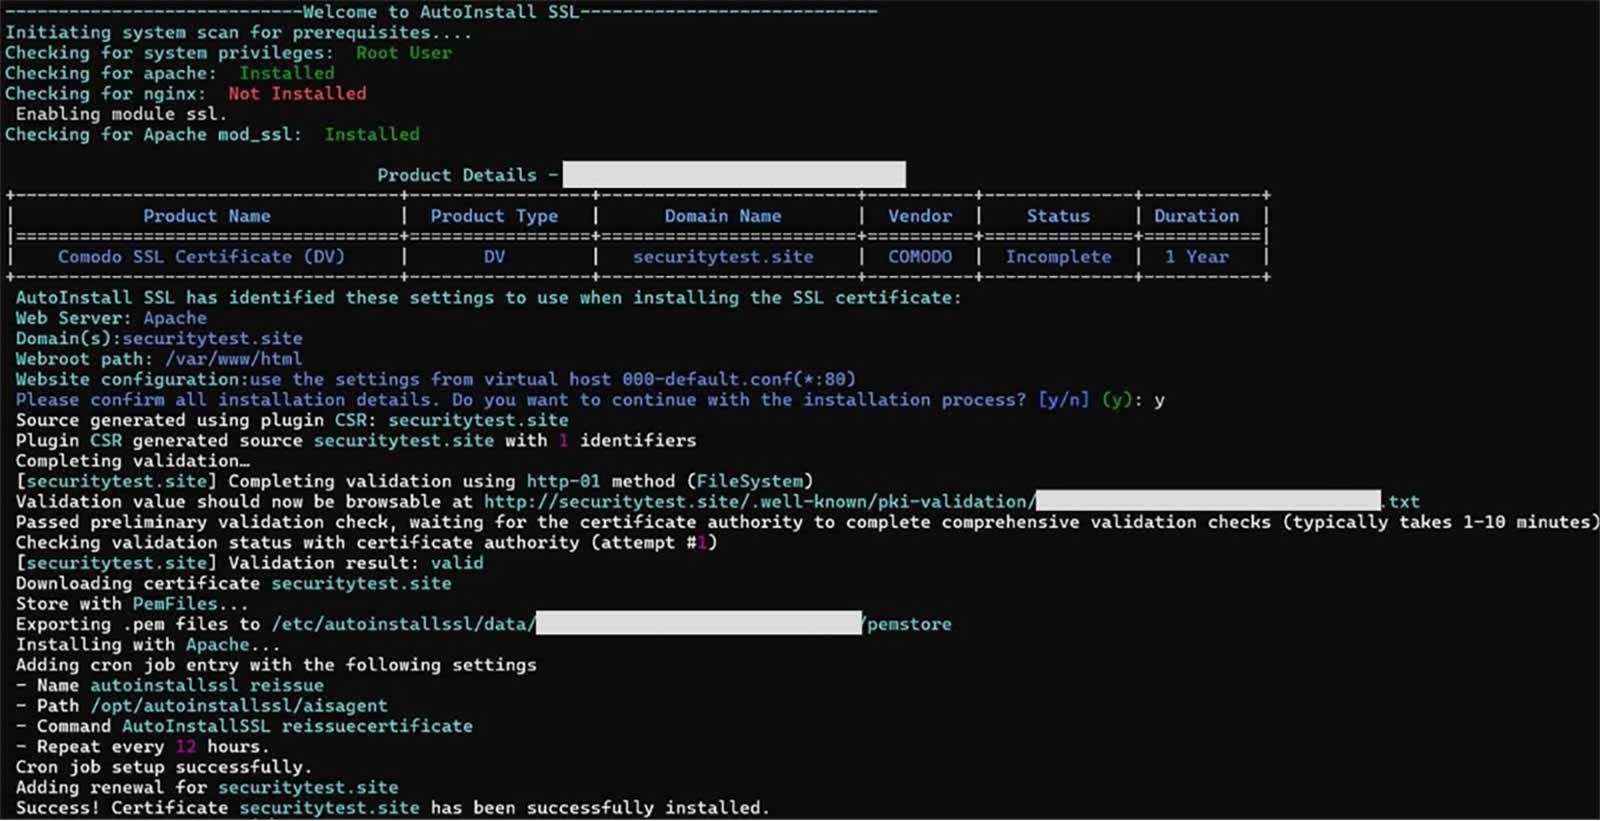
Step 2: Confirm Your SSL/TLS Certificate Is Installed Properly

AutoInstall Agent Handles Everything
The agent will:
- Auto-generate the CSR and private key
- Verify domain ownership via DNS
- Fetch and install the SSL certificate with the appropriate configurations
- Configure Apache or NGINX
Common Questions Relating to How to Install an SSL Certificate in Linux
How do I manually add a CA certificate in Linux?
Place the CA file (i.e., the server certificate, ca-bundle file, or the fullchain.pem file) in the directory /etc/SSL/certs/ and run:
sudo update-ca-certificatesDo I need to reboot my server?
Not necessarily — you can just restart Apache2 or NGINX to apply any changes.
Can I reuse a wildcard certificate on multiple servers?
Yes. Securely copy the .crt and .key files to each server.
Is AutoInstall SSL safe?
Yes. It uses encrypted communication and only modifies the necessary config files.