Securing your subdomains with a wildcard SSL certificate is one of the most efficient ways to manage multiple sites under the same domain on Windows Server 2025 (IIS). Whether you want to take full control via manual installation and configuration methods or prefer a hands-off approach using a seamless automated solution (e.g., CertPanel’s AutoInstall Agent), this guide walks you through both approaches.
What Is a Wildcard SSL Certificate?
A wildcard SSL certificate is a small file that allows you to secure a domain and all of its single-level subdomains. For example, you could secure all first-level subdomains on your domain (e.g., *.example.com covers www.example.com, blog.example.com, mail.example.com, etc.) using one certificate.
This saves time and money compared to purchasing separate certificates for each subdomain individually and simplifies certificate management.
Let’s dive into the two methods you can use to install a wildcard SSL certificate on your Windows Server 2025 IIS.
Manual Method: Wildcard SSL Installation in IIS (Windows Server 2025)
Step 1: Generate a Certificate Signing Request (CSR)
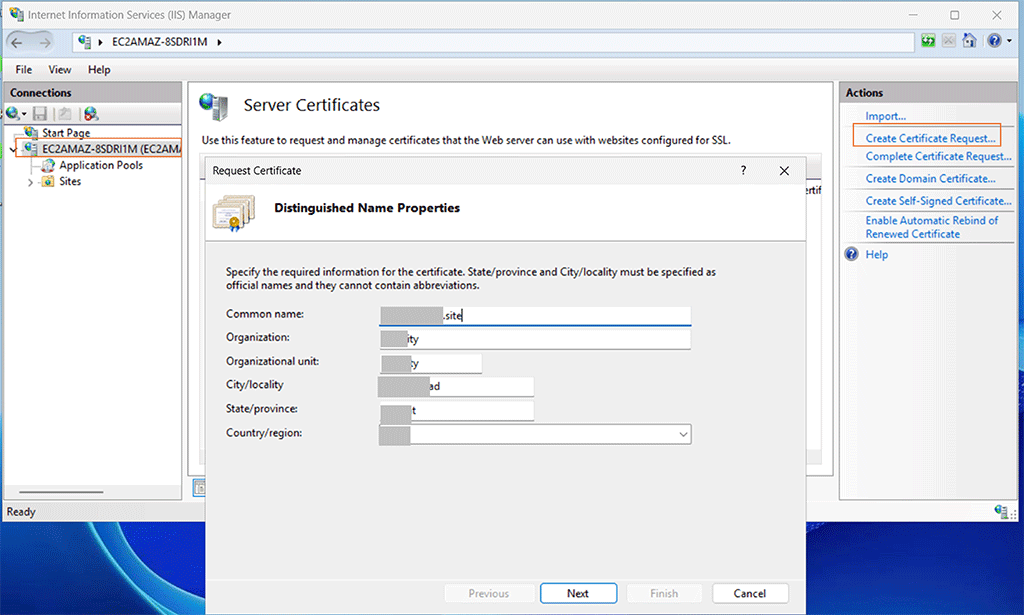
Start by generating a CSR in Windows Server IIS:
- Open (IIS Manager) (inetmgr).
- Select your server from the left-hand Connections panel.
- Double-click Server Certificates in the center pane.
- In the right pane, click Create Certificate Request (CSR).
- Fill out the form:
- Common Name: Use a wildcard domain by adding an asterisk (*) at the subdomain level you want to secure. For example, *.yourdomain.com secures all first-level subdomains.
- Organization: Your company’s official details (i.e., its registered business name).
- Location / Country: Based on your registered business address.
- Select Microsoft RSA SChannel Cryptographic Provider with 2048-bit encryption (as a minimum).
- Save the .req file (this is your CSR).
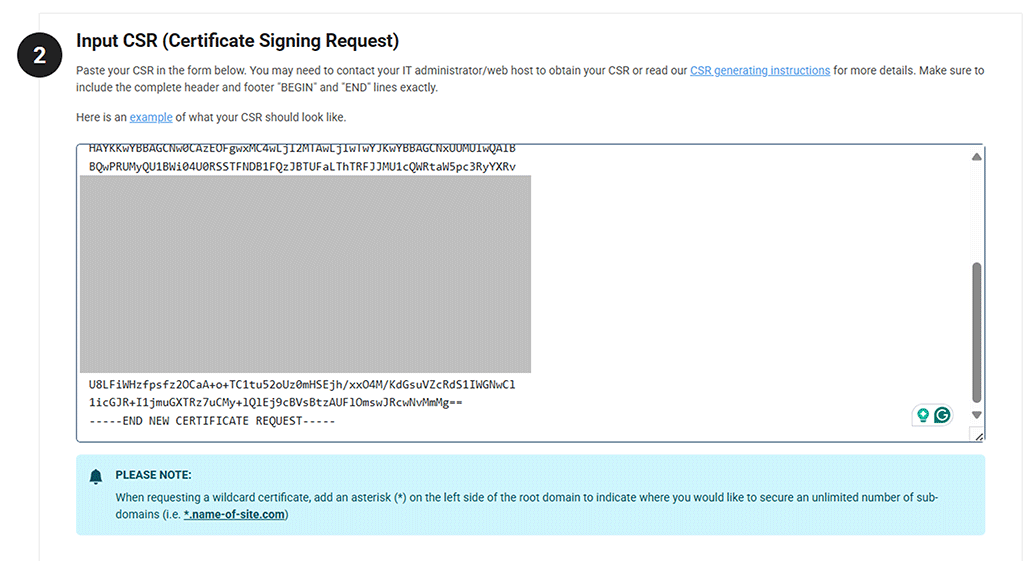
Step 2: Submit the CSR to Your Certificate Provider
Once you’ve generated your certificate signing request, the next step is to submit it to the certificate authority (CA) from which you purchased your SSL/TLS certificate.
Every CA’s process will look slightly different — some require you to paste the CSR into a form, while others allow you to upload the .csr file directly. Be sure to carefully follow the instructions provided by your CA to avoid delays in issuance.
🔹 If you’re using CertPanel:Purchasing your certificate through CertPanel makes this step easier. Instead of dealing with separate upload pages or complex forms, you can submit your CSR through your CertPanel dashboard as part of the guided certificate enrollment process.
How to Upload Your CSR in CertPanel and Request a Wildcard SSL
- Go to CertPanel and log in.
- Click New Domain (or choose one from your existing list of domains) and hit Continue.
- On the next screen, choose Manual Installation and hit Continue.
- Here, you’ll be able to paste your CSR data.
In the next few steps, you’ll:
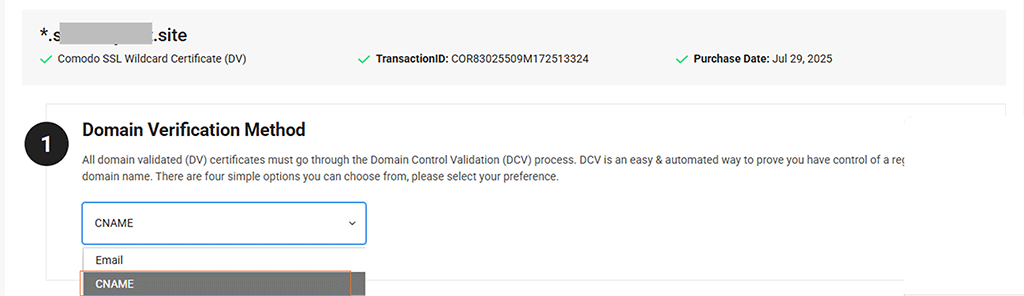
- choose a domain control validation (DCV) method (i.e., Email or CNAME). HTTP file-based validation isn’t an option for wildcard SSL/TLS certificates.
- specify your organization’s admin and technical contact information.
- sign the subscriber agreement.
Once this process is complete, move on to the validation process.
Step 3: Create a DNS CNAME Record for Domain Validation
In order to prove ownership of your domain, you must complete the DCV process. You can do this either via the email validation process or the DNS CNAME alternative.
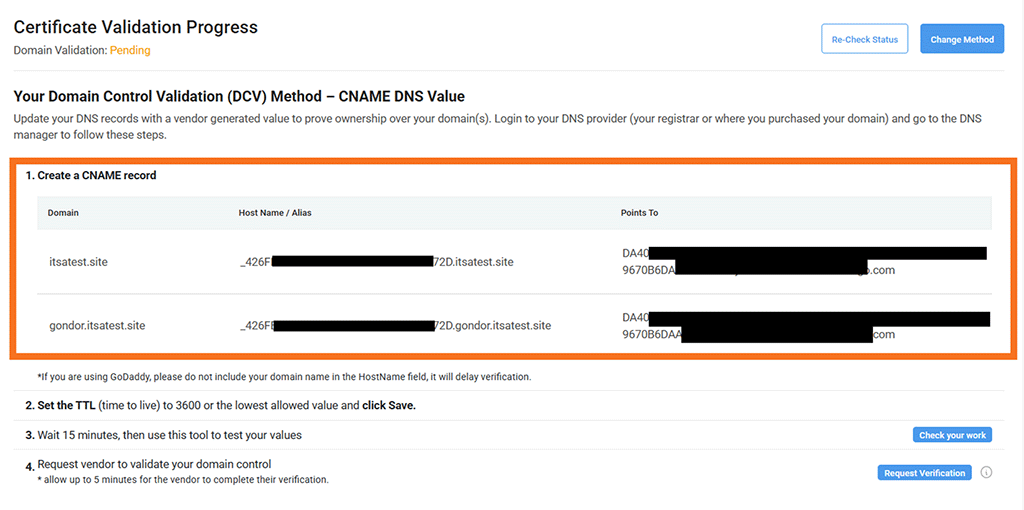
For this example, we’ve chosen to go with the CNAME method. For this, you’ll need to create a CNAME record in your DNS provider’s control panel.
- A CNAME record is a type of DNS entry that points one domain name to another.
- For SSL certificates, this record tells the certificate authority (CA) that you own and control the domain name being secured.
- The exact steps to create this record depend on your DNS hosting provider (e.g., GoDaddy, Cloudflare, Namecheap, AWS Route 53, etc.).
Important: Always copy the exact CNAME details provided by CertPanel. Changing or formatting the entry incorrectly (such as adding your domain name twice in the “Host” field) can delay validation.
If you purchased your SSL certificate through CertPanel, then you’ll find the Host (Name) and Target (Value) values to use for your CNAME record in your CertPanel account dashboard. For example, for a single-domain wildcard SSL/TLS certificate, the CNAME might look like this:

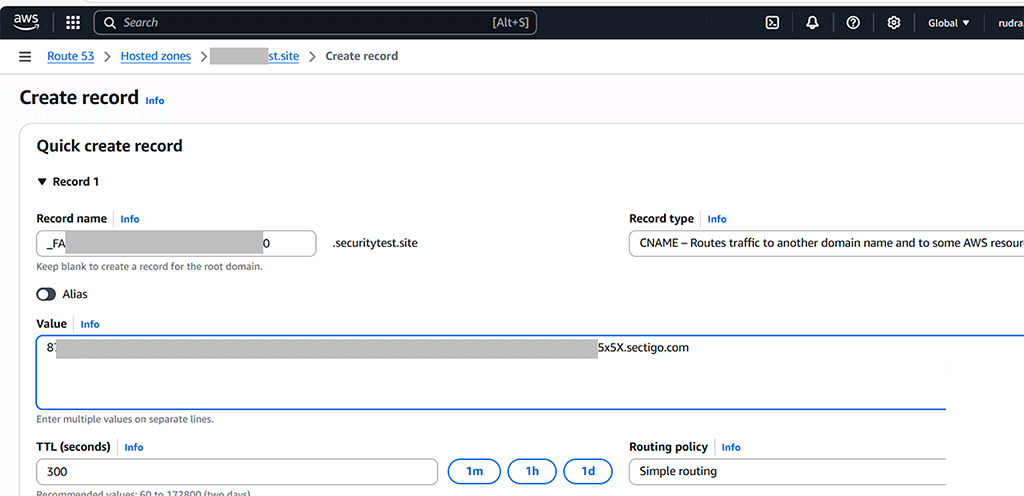
Example: How to Add a CNAME Record in AWS Route 53
Now, let’s see how this process looks in AWS Route 53 (your steps will look similar if using a different DNS provider):
- Log in to the AWS Route 53 console.
- Navigate to your Hosted Zone for the domain.
- Click Create Record Set.
- Enter the Host (Name) provided by CertPanel into the Name field.
- Select CNAME – Canonical name as the record type.
- Paste the Target (Value) provided by CertPanel into the Value field.
- Save the record.
Likewise, here’s what it looks like for a multi-domain wildcard SSL/TLS certificate:
Wait a few minutes for propagation. CertPanel will automatically verify the domain once the record is active.
Step 4: Download and Prepare the SSL/TLS Certificate Files
After your domain has been validated, it’s time to gather your server and CA bundle files. (Note: If you’re using the same Windows server that the CSR was generated on using IIS Manager, then you don’t have to manually add the private key as it’ll be linked automatically. Otherwise, you’d need to use a .pfx file that contains the certificate and its private key if you’re transferring the certificate and key from another server.)
- From CertPanel, download your certificate files:
- Server certificate — Your domain’s wildcard SSL/TLS certificate (e.g., certificate.crt or yourdomain.com.crt)
- CA intermediate certificate — This is part of your CA’s certificate chain (i.e., your_ca_bundle.ca-bundle)
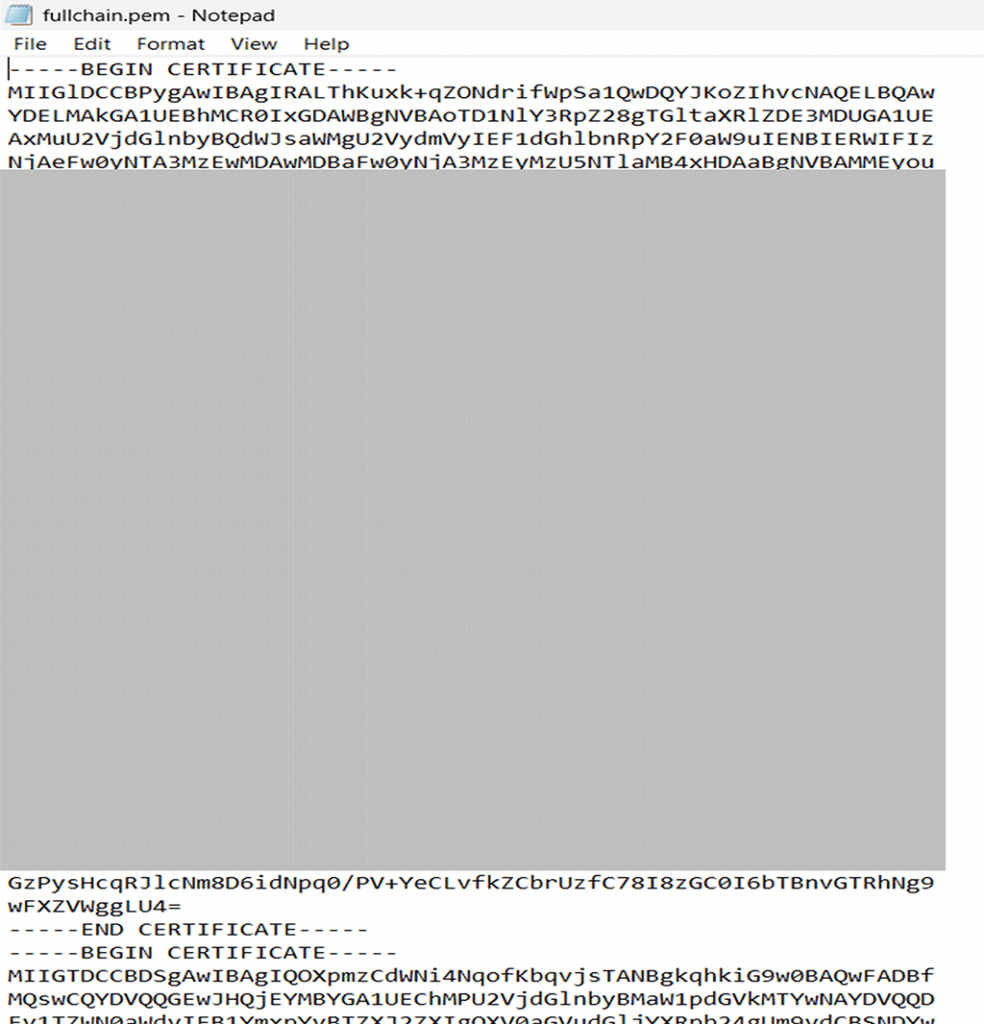
- On your Windows server, combine both the server and CA bundle certificates into a combined fullchain.pem certificate, if needed. (Note: This is likely unnecessary if you’re working on the same Windows server used to generate the CSR in IIS Manager):
- Use Notepad to append the contents of the bundle below the main certificate.
- Save as fullchain.pem.
Step 5: Install the Certificate in Windows Server IIS 2025
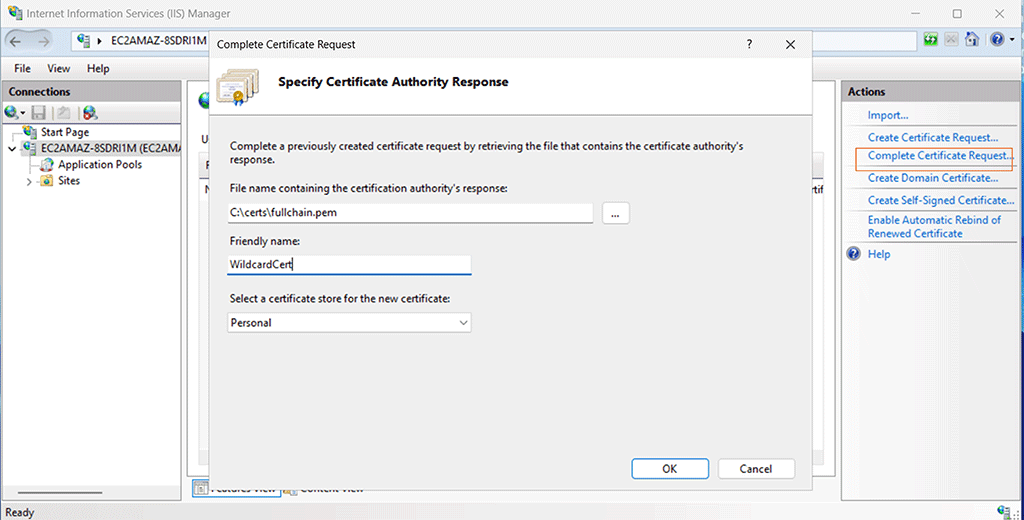
- Back in IIS Manager, open Server Certificates.
- Choose Complete Certificate Request from the right menu.
- Browse to your fullchain.pem or main server certificate file. (If importing the server certificate only, you may need to separately import the CA bundle file under the MMC Snap-In > Certificates > Intermediate Certification Authorities > Certificates.)
- Give it a recognizable Friendly Name (e.g., DomainWildcardSSL2025).
- Click OK.
Step 6: Bind HTTPS to Your Website
- Go to Sites in IIS, select your website.
- Click Bindings > Add.
- Choose:
- Type: https
- Port: 443
- SSL Certificate: Select the one you just imported.
- Save your changes.

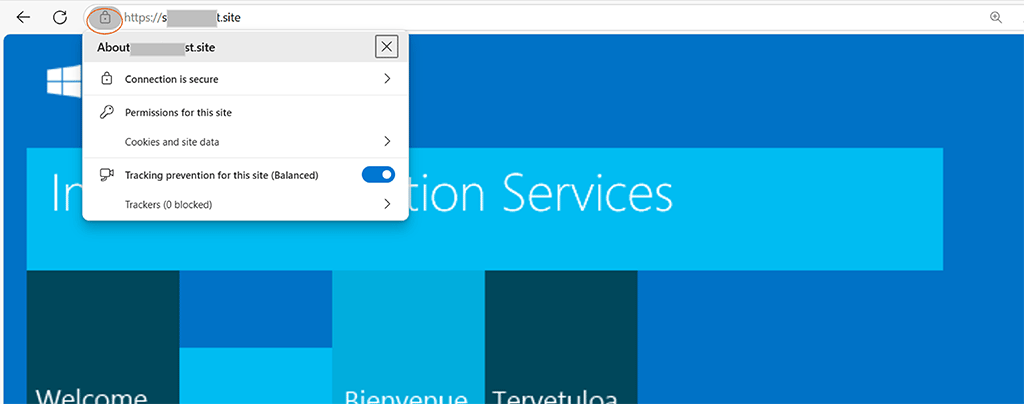
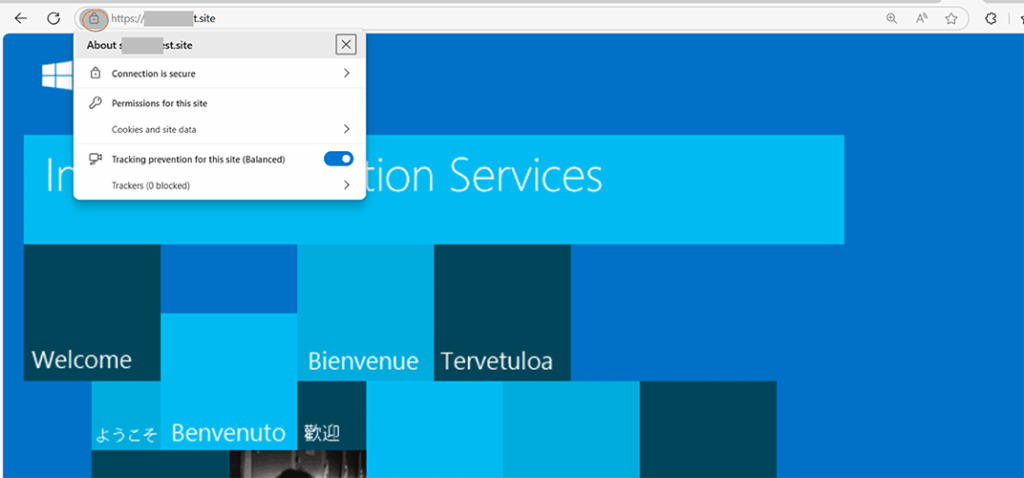
Now, access your website using a secure version of the domain (e.g., https://yourdomain.com) — it should show a valid padlock or a secure connection message (as shown in the example below):
Automatic Installation Using CertPanel AutoInstall Agent
CertPanel makes SSL installation and renewal completely hands-free with the AutoInstall SSL Agent for Windows Server 2016, 2019, 2022, and 2025. This method is perfect if you want to skip the manual steps and let the system take care of everything — from CSR generation to binding the certificate in IIS.
Step 1: Select Your Server and DNS Provider
- Go to CertPanel and log in to your dashboard.
- Choose your domain or add a new one.
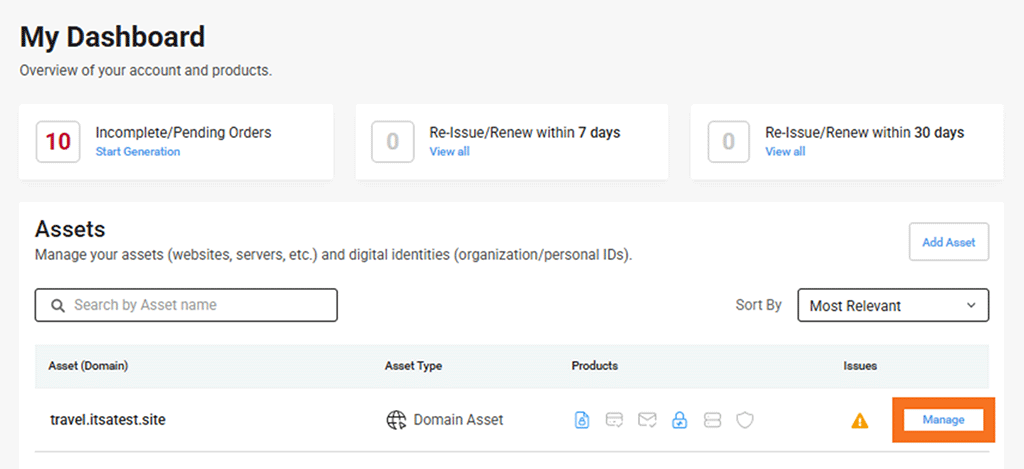
- Begin the AutoInstall SSL setup. If you exited the CertPanel previously and are trying to find it later, hit Manage next to your domain name under Assets on the main user dashboard (as shown below). On the next screen, find the certificate order and hit the Activate button under the AutoInstall SSL Status column.
- On the next page, select Automatic Installation as your preferred method. Complete the Admin and Technical Contact details on the following screen. Then, when prompted:
- Select Operating System: Windows Server (IIS)
- Select DNS Provider: Choose from AWS Route 53, Cloudflare, or other supported providers

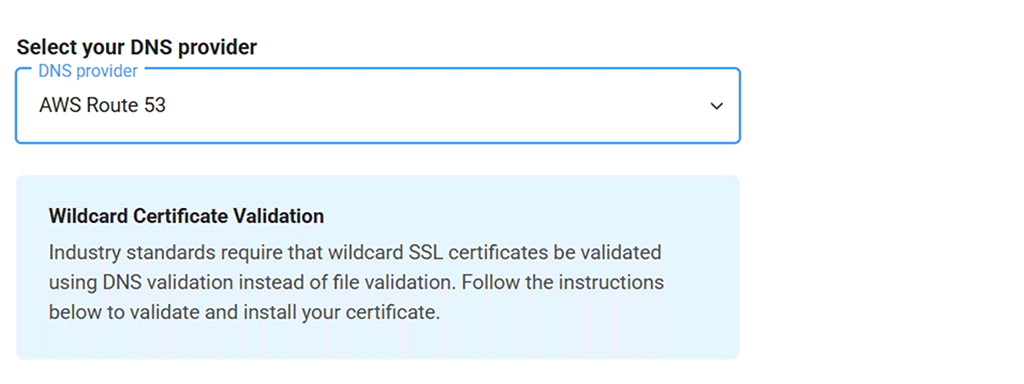
Examples of the DNS providers CertPanel supports include:
- AWS Route 53
- Cloudflare
- Digital Ocean
- DNS Made Easy
- GoDaddy
- Google Cloud DNS
- Microsoft Azure
Step 2: Generate Your DNS API Credentials
To allow CertPanel to automatically validate your domain using this DNS challenge authentication method (DNS-based authentication):
- Get your AWS Route 53 Access Key ID and Secret Access Key. (Here’s how to set up API credentials in your AWS console.)
- Click the button/link Generate API key for DNS validation for AutoInstall SSL.
- Copy those and keep them safe — they’ll be used in the next step.
Step 3: Download and Run the AutoInstall Agent
- Back in CertPanel, you’ll now see a command snippet generated based on your inputs.
- To download and run the installer on your server, copy and run the following command in your Windows Server PowerShell or Command Prompt. (Note: Be sure to remove the brackets and replace the example text with your AutoInstall SSL token, AWS access key ID, and AWS secret access key.)
powershell -Command "& { [Net.ServicePointManager]::SecurityProtocol = [Net.SecurityProtocolType]::Tls13 -bor [Net.SecurityProtocolType]::Tls12; iwr -useb https://files.autoinstallssl.com/packages/windows/version/latest/Win-AutoInstallSSL.ps1 | iex; }"Step 4: Install Your SSL/TLS Certificate
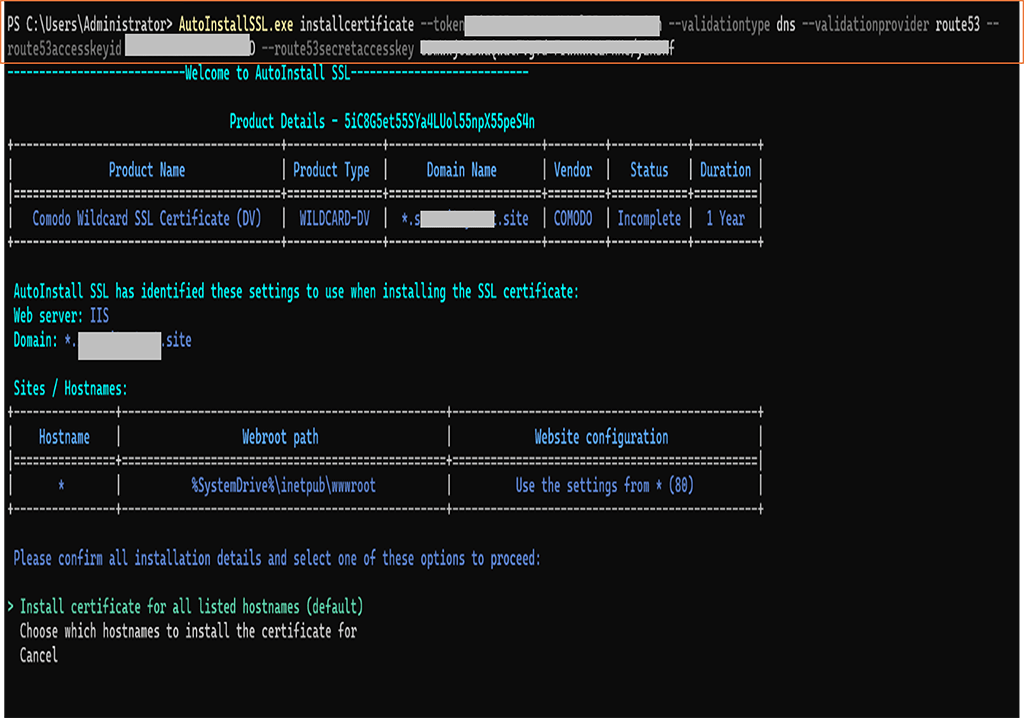
Run the downloaded AutoInstallSSL.exe. Enter the following command to install your SSL/TLS certificate. Ensure you swap out the placeholder information (written below in [ALL_CAPITAL_LETTERS]) with your unique account information:
AutoInstallSSL.exe installcertificate --token [AUTOINSTALL_SSL_TOKEN_VALUE] --validationtype dns --validationprovider route53 --route53accesskeyid [AWS_ACCESS_KEY_ID] --route53secretaccesskey [AWS_SECRET_ACCESS_KEY]During setup, you’ll paste the following in the command listed above:
- Your CertPanel API Key
- Your DNS Provider’s Access Key ID
- Your DNS Provider’s Secret Access Key
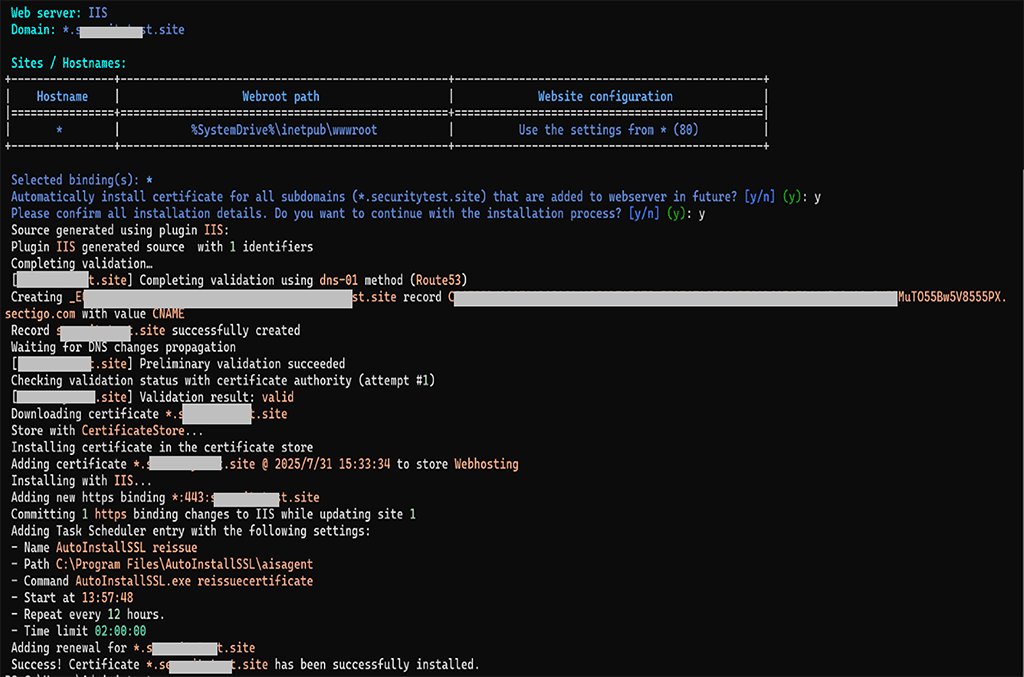
This process allows the AutoInstall SSL agent to:
- Generate the CSR automatically
- Validate your domain via a DNS challenge
- Download and install the SSL certificate
- Bind it to your site in IIS
- Set up automatic renewals with Task Scheduler
Step 5: Access Your Website to Confirm SSL
Once the setup process is complete, your website should immediately be available over HTTPS.
🔍 Open your browser and go to the secure version of your domain (e.g., https://yourdomain.com). You should see the padlock icon in the address bar, confirming that the SSL certificate is installed correctly.
That’s it! Provided everything is installed correctly, you’ve set automation to autopilot and are free to go about your day.
Frequently Asked Questions About Installing a Wildcard on Windows Server 2025
Can I use one wildcard SSL for multiple subdomains?Yes. A wildcard like *.yourdomain.com covers all subdomains on a single level. For example, you can use one to cover all first-level subdomains (e.g., mail.yourdomain.com, blog.yourdomain.com, shop.yourdomain.com), but not yourdomain.com itself unless explicitly included.
What if validation fails?Check your DNS propagation using a tool like whatsmydns.net and ensure your CNAME record matches exactly.
Can I switch from manual to automatic later?Absolutely — just install the AutoInstall Agent and input your existing CertPanel credentials.
Does AutoInstall work behind firewalls or proxies?Yes, if outbound HTTPS is allowed for API communication.
Bonus Tips for a Smooth Installation Process
- Combine certificates in the correct order: domain certificate first, then intermediate bundle.
- Keep port 443 open on both firewall and cloud security groups to allow secure, encrypted traffic to flow.
- Always back up your private key and certificate, if generated manually.
- Use an online SSL/TLS testing tool (e.g., SSL Monitor) to check your server after installing the SSL/TLS certificate.