Securing your website with HTTPS on Apache2 running Ubuntu is essential for protecting user data and improving your site’s SEO performance. This guide walks you through two proven ways to install an SSL certificate on Apache2:
- The manual method using OpenSSL and a Comodo SSL/TLS certificate
- The automated method using CertPanel’s AutoInstall SSL agent
Whether you’re configuring a new server or upgrading an existing one, follow this step-by-step guide to secure your site using the secure HTTPS protocol.
Related: Looking for a guide on how to install an SSL certificate on NGINX Ubuntu? Look no further.
Prerequisite: You Must Have an SSL/TLS Certificate
To enable SSL (or, more accurately, TLS) on your Apache Ubuntu server, you’ll need a valid SSL/TLS certificate. CertPanel.com offers a selection of certificates for trusted encryption, compatibility, and flexible options to suit different needs. (You can purchase an SSL/TLS certificate easily through your CertPanel.com user account dashboard.)
Manual Method: Installing an SSL Certificate on Apache (Ubuntu)
This section will show you how to install and configure an SSL/TLS certificate manually on your Apache2 server running the Ubuntu distro.
Step 1: Generate & Submit a Certificate Signing Request (CSR)
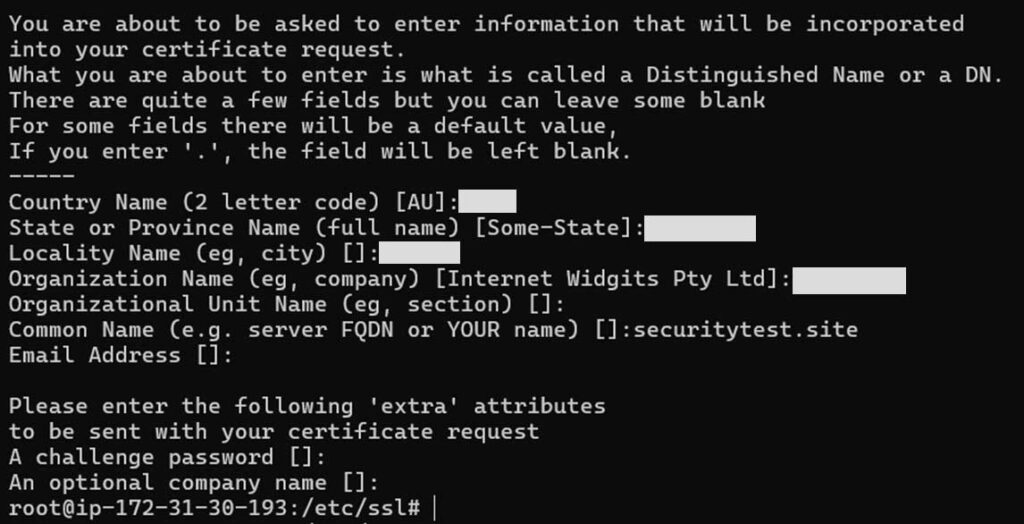
Before you can install an SSL certificate on Apache, you’ll first need to generate a CSR (and its corresponding private key) and send the CSR to the issuing certification authority (CA). To do this on your Apache Ubuntu server using OpenSSL, use a customized version of the following command:
openssl req -new -newkey rsa:2048 -nodes -keyout yourdomain.key -out yourdomain.csr This will trigger a request for several key pieces of information that will become part of the certificate once it’s issued.
The next step is to submit the CSR to the certificate provider. To submit the CSR content for orders made through CertPanel.com, navigate to All Orders > Get Started > Submit CSR in the dashboard. Make sure to include the full header and footer:
-----BEGIN CERTIFICATE REQUEST-----

[Base64 CSR content]

-----END CERTIFICATE REQUEST-----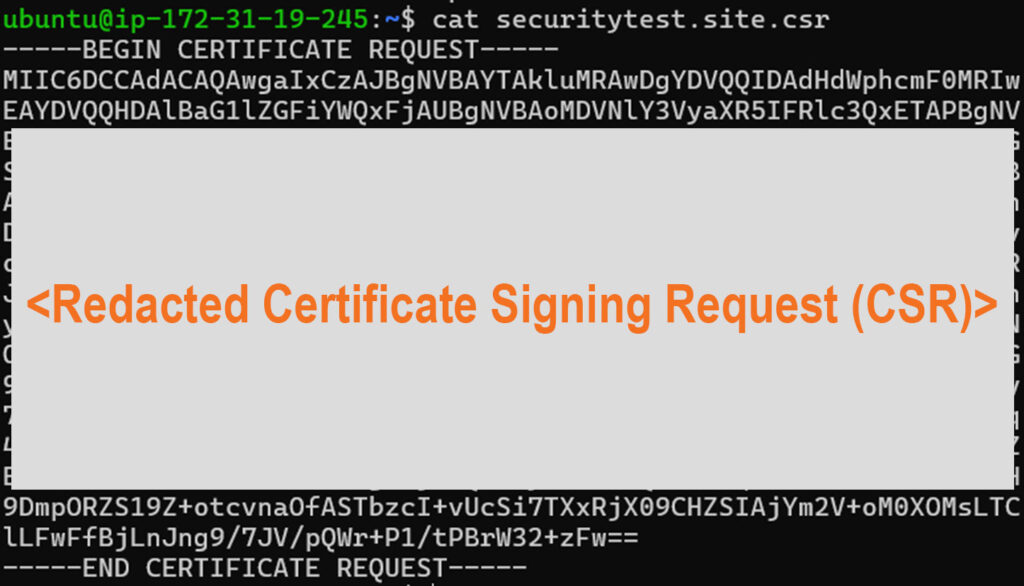
That’s it! Now, it’s time to complete the domain control validation (DCV) process.
Step 2: Prove You Control the Domain
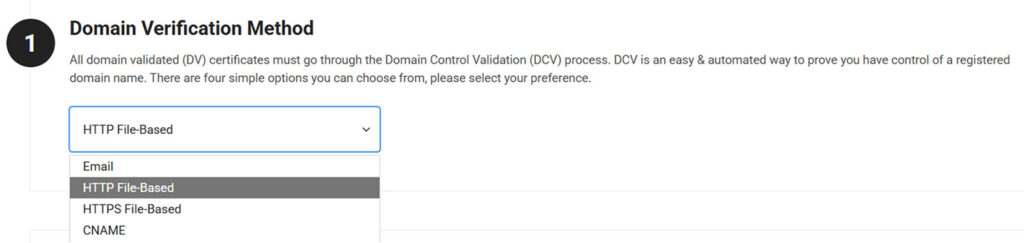
Complete domain validation using any of the methods listed below. We’ll use HTTP file-based validation for this example. (This DCV method is recommended for all SSL/TLS certificates except for wildcards, which can’t use file-based validation.)
The file-based validation method involves downloading a unique file from the certificate provider and uploading it to a specified file path on your server. This file contains your site’s hostname and a unique HTTP verification token value.
For this example, we’ll download the .txt file from the CertPanel dashboard and upload the file on an Apache server at:
/var/www/html/.well-known/pki-validation/filename.txt 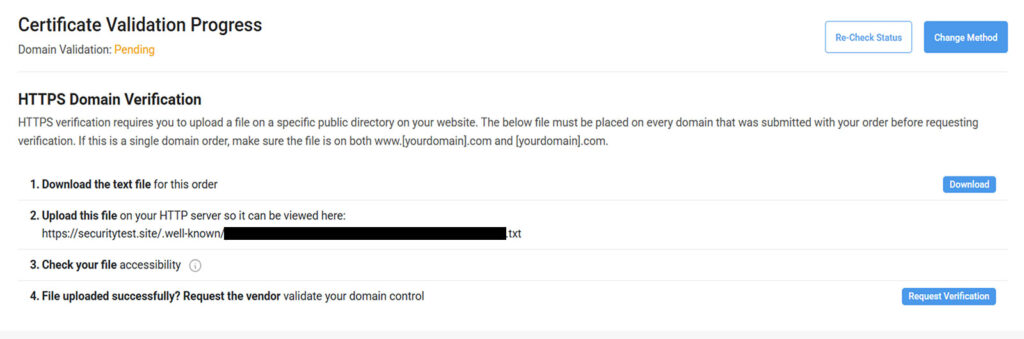
Here’s what this may look like on your server:

Your server needs to be able to access the validation file publicly, which means setting the correct Linux permissions for both the directories and the file itself.
- Use 755 on the directories to allow the server to read, write, and execute, and other groups read and execute permissions only:
sudo chmod 755 /var/www/html/.well-known

sudo chmod 755 /var/www/html/.well-known/pki-validation- Use 644 on the file to allow the server to read and write on it while keeping it protected from changes by other users by only assigning them read permissions:
sudo chmod 644 /var/www/html/.well-known/pki-validation/filename.txt Once you’ve uploaded the validation file and set the correct permissions, it’s time to verify that the file is publicly accessible. Open your browser and navigate to:
https://yourdomain.com/.well-known/pki-validation/filename.txt If the file loads successfully and displays the correct validation content, return to the CertPanel dashboard and click Request Verification. Wait a few minutes, then click Re-check Status to confirm that your domain has been validated.

Step 3: Download and Install Your SSL Certificate Files
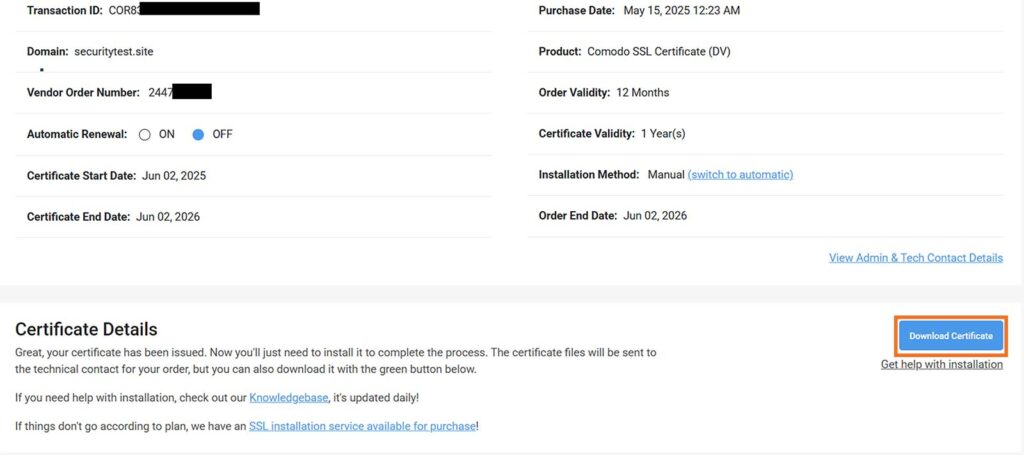
Once your domain is validated (along with any other relevant organization information for higher-validation certificates), it issues the SSL certificate. You can download the .zip file for your certificate from the CertPanel dashboard, as shown below:
Next, you must unzip the file folder containing at least these two files:
- yourdomain.crt (domain certificate)
- your_ca_bundle.ca-bundle (intermediate CA)
Upload the files to your server using the following command (just be sure to replace the placeholder data with your specific file- and domain-related information):
scp -i your-access-key.pem yourdomain.crt your_ca_bundle.ca-bundle user@your_ip:/home/user/ To move these files to secure directories, use the following:
sudo mv yourdomain.crt your_ca_bundle.ca-bundle /etc/ssl/certs/

sudo mv yourdomain.key /etc/ssl/private/
Note: Unlike NGINX, Apache does not require you to create a combined certificate chain file (fullchain.pem). Instead, you can directly reference the individual certificate and CA bundle files using the SSLCertificateFile and SSLCertificateChainFile directives.
Set file permissions to ensure your SSL files are secure and readable by Apache:
sudo chmod 644 /etc/ssl/certs/<domain>.crt

sudo chmod 600 /etc/ssl/private/yourdomain.key
Step 4: Configure Apache2 to Use SSL
Now that your SSL files are in place and permissioned correctly, it’s time to tell Apache to use them. This involves enabling SSL support and setting up a secure Virtual Host configuration for your website.
First, enable Apache’s SSL module (this allows Apache to handle HTTPS requests):
sudo a2enmod sslNext, you’ll create (or update) a Virtual Host file specifically for SSL traffic. This is where Apache will be instructed to load your certificate, key, and CA bundle files. Use the following command to open or create the configuration file:
sudo nano /etc/apache2/sites-available/yourdomain-ssl.conf Inside the file, paste the following configuration block — be sure to replace placeholder values with your actual domain and certificate file names:
<VirtualHost *:443>

    ServerAdmin admin@yourdomain.com

    ServerName yourdomain.com

    DocumentRoot /var/www/html


    SSLEngine on

    SSLCertificateFile /etc/ssl/certs/yourdomain.crt

    SSLCertificateKeyFile /etc/ssl/private/yourdomain.key

    SSLCertificateChainFile /etc/ssl/certs/your_ca_bundle.ca-bundle


    <Directory /var/www/html>

        Options Indexes FollowSymLinks

        AllowOverride All

        Require all granted

    </Directory>


    ErrorLog ${APACHE_LOG_DIR}/error.log

    CustomLog ${APACHE_LOG_DIR}/access.log combined

</VirtualHost>
Enable the site and restart Apache:
sudo a2ensite yourdomain-ssl.conf

sudo systemctl reload apache2
Now, test your website to see whether the changes have taken effect. If so, you should see the SSL/TLS certificate information and your site listed as being secure:

Automatic Method: Use AutoInstall SSL Agent (Apache2 Ubuntu)
Don’t want to spend time figuring out how to install and configure every SSL certificate on your Apache Ubuntu web server? The good news is that you don’t have to — there’s an automated solution that can do it for you. Meet CertPanel AutoInstall SSL.
Step 1: Start the SSL Certificate Enrollment Process
Log in to CertPanel, go to All Orders > Get Started > Complete Certificate Enrollment, and select Automatic Installation. Press Continue to agree to the Subscriber agreement.

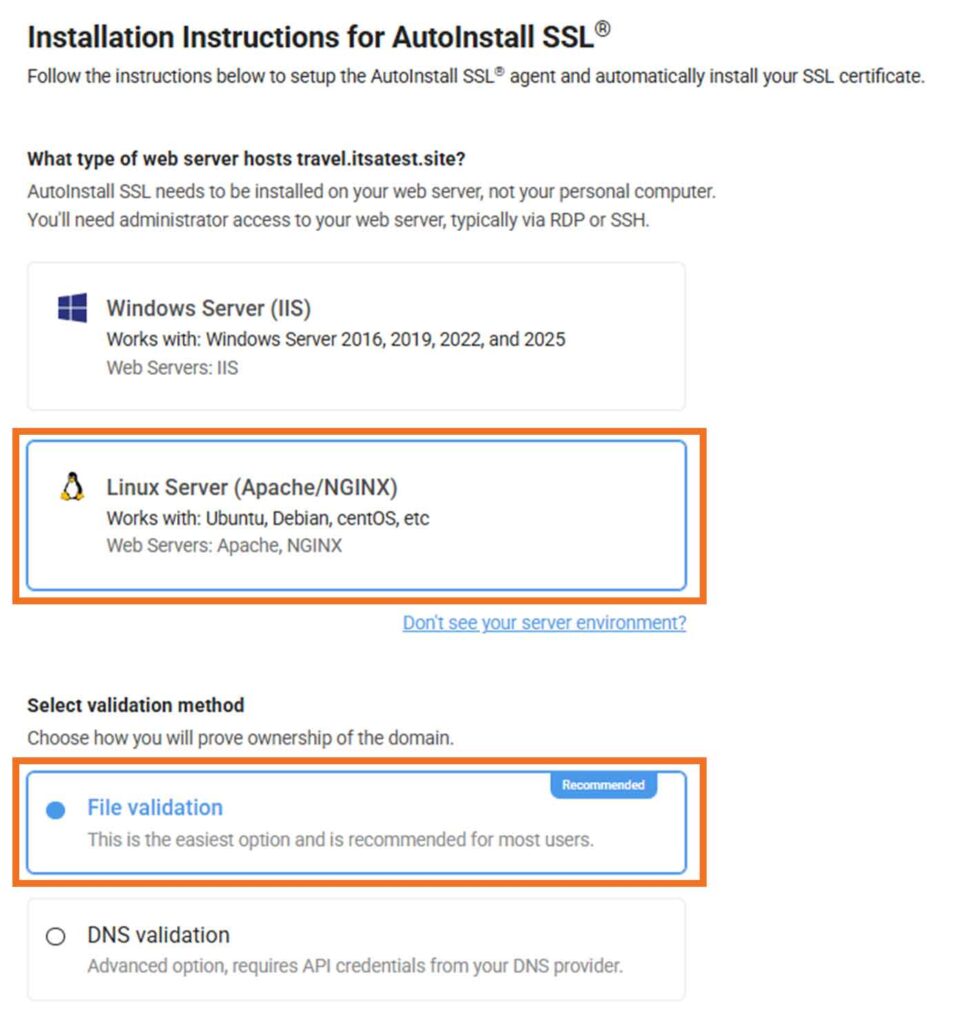
Step 2: Specify Your Server Type (Apache)
Choose Linux Server (Apache/NGINX) and proceed with file-based or DNS validation (so long as you’ve not selected a wildcard SSL/TLS certificate because file-based validation isn’t an option for those certificates).
Step 3: Install AutoInstall SSL on Your Apache2 Ubuntu Server
SSH into your Ubuntu server and run the following command to download and launch the AutoInstall SSL installation script:
sudo wget -qO - https://sb.files.autoinstallssl.com/packages/linux/version/latest/get.autoinstallssl.sh | sudo bash -sYou’ll need to get your AutoInstall SSL token for the next command, which can be found in the CertPanel.com dashboard. Scroll to the Assets section, find the domain and hit Manage. Scroll down to the SSL Certificates section, locate the certificate you want to use AutoInstall SSL to install, and select Manage again.

You should now be in the Manage Order — Enroll Now screen. Scroll down to the AutoInstall SSL section and you’ll find the token listed (as shown below):
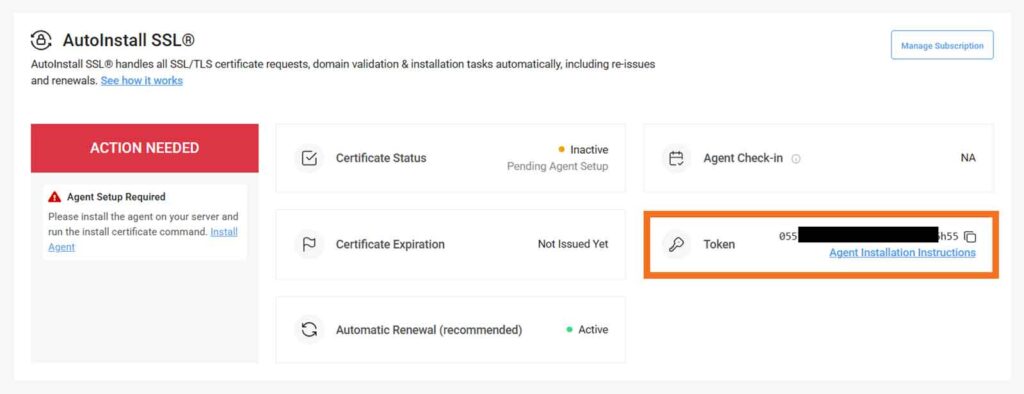
NOTE: Select the Agent Installation Instructions highlighted under the token above to launch the installation wizard.
Once the script is ready, run the following command, which includes the AutoInstall SSL token, to begin the installation process:
sudo runautoinstallssl.sh installcertificate --token YOUR_TOKEN --validationtype file --validationprovider filesystem 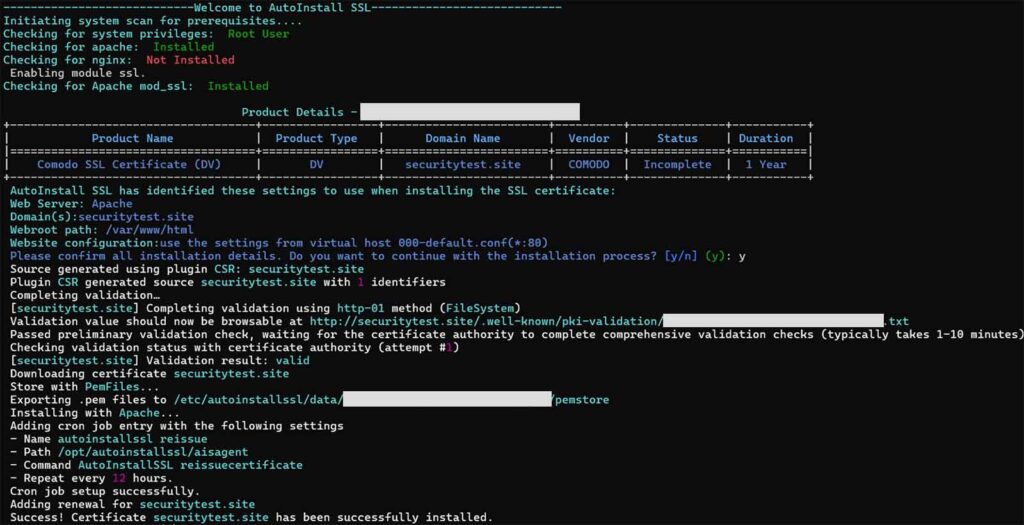
Once completed, the CertPanel AutoInstall SSL agent will be ready to use to automate the following:
- Generate your CSR(s)
- Complete domain control validation(s)
- Download and install SSL certificate(s) on your server
- Update your Apache2 configuration
Just press Enter when prompted to complete the process.
Related: Learn additional AutoInstall SSL Agent Commands
Step 4: Verify That the SSL/TLS Protocol Is Working on Your Apache Site
Once the installation is complete, open your browser and visit https://yourdomain.com. Make sure the site loads without any security warnings and displays the secure padlock icon — this confirms that your SSL certificate is active and properly configured to enable a secure, encrypted connection.
- Test Your SSL Configuration: Use an SSL online scan tool to analyze your server’s SSL setup, grade its security, and identify any vulnerabilities. CertPanel SSL Monitor is one such resource that enables you to identify 110+ SSL and server-related vulnerabilities.
- Ensure Accurate System Time: Keeping your server’s clock in sync is essential for SSL validation. Use timedatectl or ntpd to set and manage date/time correctly.
- Enable Auto-Renewal via AutoInstall SSL: CertPanel’s AutoInstall SSL agent supports automated renewals. Learn how to configure it here.
Why Choose Automatic Installation Over Manual Methods?
1. Be Prepared for Shorter Certificate Lifespans in the Future
While most publicly trusted SSL/TLS certificates still have a maximum validity of 398 days, browser vendors and CAs have announced plans to gradually reduce this to just 47 days by 2029. Automating installation and renewal now helps you future-proof your site against the upcoming shift — reducing the risk of missed renewals, downtime, or browser warnings.
2. Save Time and Reduce Manual Effort
AutoInstall SSL handles everything from CSR generation to Apache2 configurations within minutes.
3. Eliminate the Human Error Factor in Config File Updates
No typos, permission issues, or misconfigured virtual hosts.
4. Eliminate Time-Consuming Certificate Installation Tasks with Auto-Renewals
Never worry about manually renewing your SSL/TLS certificates again — let the AutoInstall SSL agent handle it for you.
5. Great for Beginners and Pros Alike
One command is all it takes. No Apache knowledge is required.
Additional Tips
- Use CertPanel’s SSL Monitor to monitor your site for certificate expiration and 110+ SSL/TLS vulnerabilities
- Keep Apache2 and OpenSSL updated
Common Questions
Can I replace an existing Apache2 certificate with a new one?
Yes — upload the new .crt, .key, and .ca-bundle files to your server, update the paths in your Apache virtual host file, and reload Apache2 to apply the changes. For a smooth transition, it’s best to do this at least 7–10 days before your current certificate expires, giving you time to verify everything is working correctly and avoid potential downtime.
Do I need to restart Apache2 after renewal?
Yes. Run sudo systemctl reload apache2 to apply changes.
Is fullchain.pem required for Apache2?
No. Apache2 uses SSLCertificateChainFile with separate .crt and CA bundle files.
How can I test Apache2 SSL config?
To verify that your Apache SSL configuration is correct and error-free, run:
sudo apache2ctl configtest
If OK, restart Apache:
sudo systemctl reload apache2What if you don’t see “Syntax OK”?
If there’s a syntax error, the output will tell you which line or file has an issue. Common issues include:
- Incorrect file paths for your SSL certificate or key
- Missing or extra characters in the <VirtualHost> block
- Invalid directives or typos
Review the indicated line in your config file, correct the issue, and run the test again. You can also check Apache’s error logs for more details:
sudo tail -n 50 /var/log/apache2/error.logDoes AutoInstall SSL work with Apache2?
Yes — the agent detects your Apache server and configures it accordingly.
Can I automate Apache2 SSL certificate renewals with AutoInstall SSL?
Yes. AutoInstall SSL supports renewals and reconfiguration automatically.